
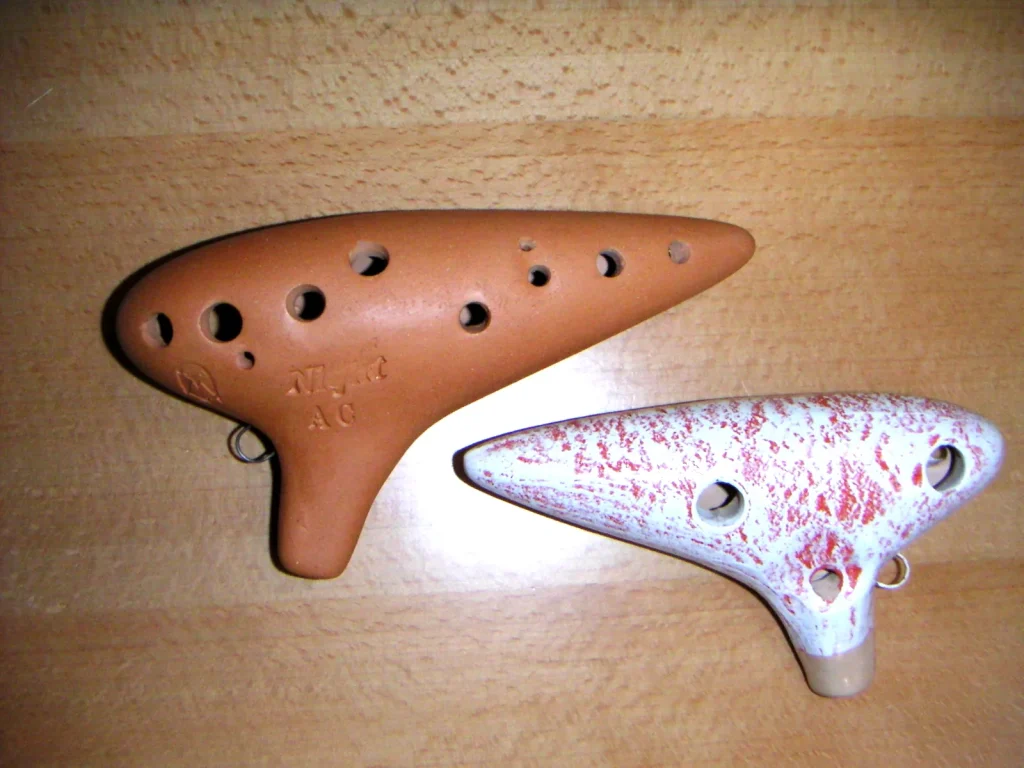
Want to create your own musical instrument? This short tutorial explains how to shape a resonating chamber from air-dry clay and make a playable instrument.
Key steps: shape the mouthpiece and whistle with a beveled stick, drill the holes with 2 to 8 mm bits, then tune the instrument with an electronic tuner.
Air-dry the piece for 24 to 96 hours, away from direct sunlight. Firing it in a kitchen oven is not recommended: vitrification requires about 1,250°C, a temperature a kitchen oven cannot reach.
This process captures the simplicity of making something by hand while offering technical guidance on airflow, the sharpness of the beveled edge and gradual drilling.
For a complete plan and materials list, see our practical guide to making an ocarina.
Introduction: an ancient instrument and a creative project for today
With its compact shape, the ocarina combines simplicity of form with a rich sound. Popularized in nineteenth-century Italy, this globular instrument works through a chamber in which blown air produces changing notes.
This project is easy to make with clay, allowing plenty of customization while keeping costs down. Workshops show that it suits beginners and more experienced makers alike.
- History and use: a small shape with a big musical impact.
- Physical principle: airflow directed into a resonating chamber.
- Educational value: creativity, technique and patience together.
| Benefit | Why | Average time |
|---|---|---|
| Accessibility | Simple shape, few tools | 1 to 3 hours of workshop time |
| Customization | Easy to shape and decorate | Several sessions, depending on the finish |
| Room for adjustment | Clay can be reshaped | Includes drying time |
Before you begin, decide what you want to make: a playable decorative object, a practice instrument or a starting point for future versions. The time you spend in the workshop is also a chance to learn and enjoy creating.
How to make a clay ocarina: a step-by-step guide
The acoustics of a vessel flute depend on precise airflow and a cleanly cut sound window.
Understand how it works
The windway directs air toward a beveled edge. This edge splits the airflow at a precise angle and makes the chamber resonate.
The vibration of the air in this chamber produces the fundamental note and its harmonics. This mechanism distinguishes the instrument from a simple whistle.

Goal and methods
The goal is to follow a structured method to produce in-tune notes and a clear sound.
Key techniques include controlling wall thickness, cutting a clean sound window and drilling gradually, checking your work at each stage.
- Precision: a millimeter at the mouthpiece can change the tuning.
- Process: prepare the clay, form the chamber, make the mouthpiece, drill, tune and dry the instrument.
- Expected result: a clear tone, easy sound production and well-spaced notes.
Tip: work in stages: test, adjust and test again for the best result.
Essential materials and tools for a successful ocarina
Choosing good materials reduces the risk of cracks and makes every step easier. Choose good-quality, fine-grained air-dry clay to limit breakage during drying.
Clay, water and material choice
Choose a stable clay that is easy to rework, and keep a small bowl of water nearby.
A uniform mixture without air bubbles holds together better. The quality of the material determines how sturdy the finished instrument will be.
Precise tools for clean work
Gather a thin-bladed knife, beveled wooden sticks and 2 to 8 mm drill bits so you can enlarge the holes gradually.
Medium-grit sandpaper lets you remove rough edges neatly after shaping.
Prepare your workspace
Work on a smooth, slightly damp surface, and keep small objects and sharp tools out of children’s reach.
Check your tools before each session so you can make clean cuts and precise angles.
Prepare the clay and form the chamber: step-by-step methods
Start with a palm-sized ball of clay. Knead it for five minutes, gently tossing it onto the table to drive out bubbles and make the clay uniform.
Remove air and prevent cracks
Add very little water to keep the clay workable without soaking its surface. This helps reduce cracks as it dries and makes shaping easier.
Two tried-and-tested approaches
Method 1: make two even hemispheres. Aim for walls 3 to 5 mm thick. Score the edges, moisten them and join the two halves.
Method 2: shape a ball 6 to 8 cm across and hollow it out, keeping the walls an even thickness. This approach creates the chamber more quickly.
Join the parts and make an airtight seal
Score grooves into the edges, then carefully smooth the seam with a flat tool or your fingers. Flatten the bottom slightly to make the instrument stable.
- Check the size and wall thickness to get a good acoustic response.
- Check the symmetry and plan the mouthpiece orientation and the positions of the future holes.

Shape the mouthpiece and whistle: angle, airflow and the first sound
Good sound starts with a well-shaped mouthpiece and an aligned windway.
Form the mouthpiece and windway
First, shape a suitably sized rectangle of clay for the mouthpiece. Insert a damp, beveled stick parallel to the windway to guide the airflow.
Tip: keep the stick parallel to the windway as you shape the clay to ensure a smooth path for the air.
Make the sound window and angle
Cut the sound window with a knife or stick. Shape the striking edge at an angle close to 45°: this is essential for a clear whistle.
A sharp, clean edge improves the precision of the sound. Avoid blunt beveled edges, which disrupt the tone.
Test and make small adjustments
Remove the stick and test the sound by blowing gently, then more strongly. If the sound is unclear, reinsert the stick and refine the beveled edge a millimeter at a time.
“A one-millimeter adjustment can transform the clarity of the whistle.”
Keep a little water nearby to smooth the clay without softening its shape. Use precise tools and work in small steps: remove only a little material and test often.
- Shape a proportionate mouthpiece and align the windway.
- Cut the sound window precisely with a knife to create an angle of about 45°.
- Keep the edges sharp and the shape even.
- Test early, make small adjustments and stabilize the shape before drilling.
To learn more about the techniques and tools used in workshops, see our practical guide to making an instrument.
Drill the holes and tune precisely for accurate notes
Precise drilling determines your instrument’s final intonation. Start by marking the hole positions, taking comfort and finger size into account. Use templates to keep the holes evenly aligned.
Step by step: drill with 2 to 8 mm bits, increasing the diameter in small increments. Test each opening after drilling.

Positioning and gradual increases in diameter
Mark the hole positions and begin with a narrow drill bit, then gradually widen each hole. This limits mistakes and makes it easier to tune the notes accurately.
Use an electronic tuner
Place the tuner near the mouthpiece and begin with the lowest note, with all holes covered. Then work upward, testing each hole.
Correct a note that is too low or too high
If a note is too low, widen its hole very slightly. If it is too high, check the sound window, airflow and the condition of the hole edges.
- Drill gradually and clean up the edges to prevent unwanted whistling.
- Adjust the diameter a millimeter at a time; a small change is often enough.
- Record the final diameters for future instruments.
| Stage | Action | Goal |
|---|---|---|
| Marking | Mark positions with a template | Comfort and alignment |
| Gradual drilling | Use 2 to 8 mm bits in increments | Control the rise in pitch |
| Testing | Place a tuner near the mouthpiece | Establish a consistent scale |
| Correction | Enlarge a hole or adjust the sound window | Refine tuning and pitch |
Drying, hardening and firing: allow enough time and avoid problems
Gradual drying is essential for structural stability and final tuning. Let the piece rest on a flat, permeable surface to reduce internal stress.

Time and method
Allow 24 to 96 hours, depending on the thickness and ambient humidity. Turn the piece regularly so moisture evaporates evenly and the shape does not warp.
Limit cracking
Cover the surface with a damp cloth for the first few hours. Small touch-ups with water can close emerging hairline cracks before drying resumes.
Firing: limits and alternatives
Vitrification requires about 1,250°C, a temperature a household oven cannot reach. Firing on a barbecue produces poor results. If you do not have access to a professional pottery kiln, choose air-dry clay.
| Stage | Action | Goal |
|---|---|---|
| Positioning | Flat, permeable surface | Even out evaporation |
| Monitoring | Turn regularly; use a damp cloth | Prevent cracks and warping |
| Touch-ups | Apply water to specific areas | Close hairline cracks |
| Material choice | Air-dry clay | Avoid firing at home |
Take the time you need: rushing the drying process harms the acoustic stability of your ocarina and may damage the instrument.
For more on the steps and materials, see our practical guide.
Finishes, customization and alternative materials
Finishes improve the appearance without changing the sound. Choose suitable materials and work in stages. Test the whistle and mouthpiece often as you work.
Sanding, acrylic paint and varnish
Sand with fine-grit paper, such as 400-grit, to smooth the surface without changing the shape of the windway. Even sanding prevents rough spots and air leaks.
Apply thin coats of acrylic paint. Let each coat dry to preserve resonance and a clear sound.
- Varnish: choose several thin coats rather than one thick coat.
- Check: test the instrument after each stage.
“Even a thin coat of varnish can quickly muffle the sound if you apply too much.”
Wood or metal: requirements and adaptations
Wood has a warm appearance but requires glue, extensive sanding and protection from moisture.
Metal is sturdy but requires suitable tools, welding and fine adjustments. In both cases, the general method—from the chamber through the sound window and holes to tuning—remains the same.
| Material | Tools | Advantage | Drawback |
|---|---|---|---|
| Clay | Simple tools | Easy to shape | Susceptible to moisture |
| Wood | Glue, sander | Warm appearance | Time-consuming work |
| Metal | Welding equipment, grinder | Very sturdy | Complex techniques |
Assess the final quality by the neatness of the finish, the stability of the notes and how comfortable the instrument feels in your hand. Protect it in a case and store it in a dry place to extend its life and preserve its sound.
Conclusion
The final step is to fine-tune the instrument and let it dry undisturbed. Allow 1 to 2 hours of active shaping, followed by 24 to 96 hours of slow drying to preserve acoustic stability.
Test with an electronic tuner to produce accurate notes. Drilling or enlarging holes raises the pitch; adjusting the sound window and airflow can help correct a note that is too high.
Avoid firing at home unless you have a pottery kiln. Choose air-dry clay for a reliable result. Watch for bubbles, cracks and rough edges.
Use the right tools, including a knife, drill bits and sandpaper, and work in stages. Fine sanding, a light coat of acrylic paint and a thin layer of varnish help preserve the instrument’s sound.
For more detail on the steps and a materials list, see our practical guide and practice the techniques: a well-prepared ball of clay and clean edges help produce a reliable, musical ocarina.