
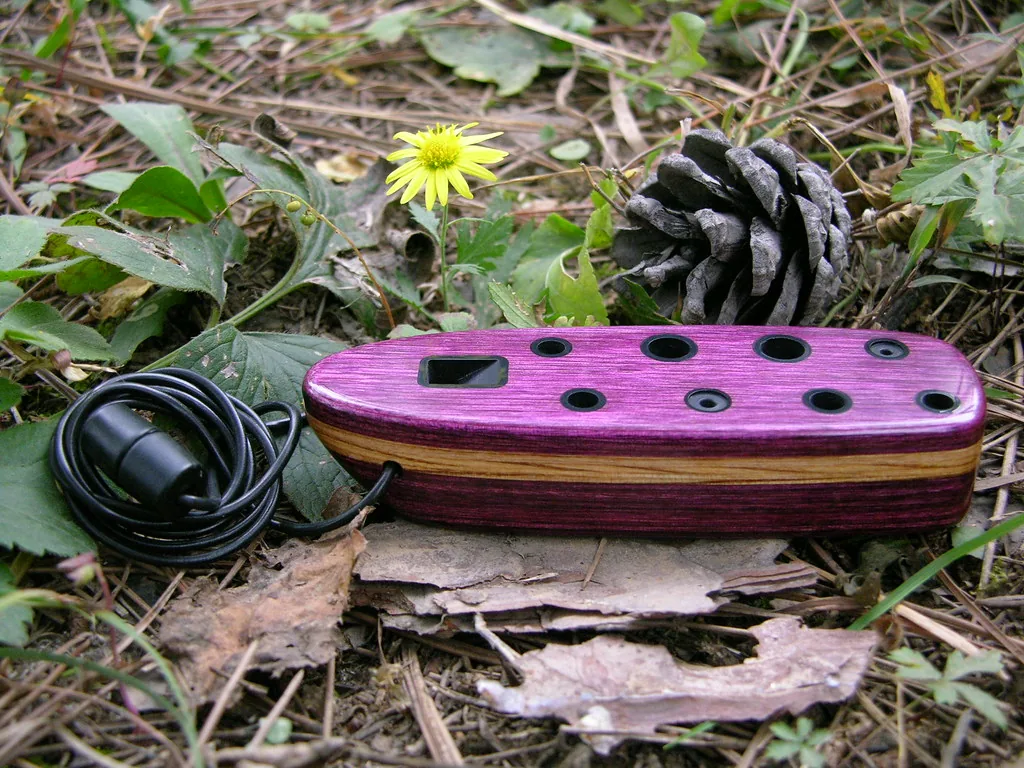
Welcome: this guide shows you how to get started with this simple, charming instrument. With a few weeks of regular practice, you can play your first melodies.
The ocarina is a compact wind instrument. Plastic and ceramic models are affordable and durable, making them suitable for beginners. It does not require a powerful breath; natural breathing is enough.
We present a clear method: choosing a model, holding it, forming your embouchure, placing your fingers, producing your first sounds and learning essential fingerings. Resources such as OcarinaTabs.org and MuseScore can speed up your learning.
With 10 to 20 minutes a day, you can make quick progress. By the end of this guide, you will be able to play a short piece, understand how to continue learning and avoid common mistakes.
Choose your first ocarina to get off to a good start
Your choice of first ocarina affects your comfort and musical progress. First, consider the type: a 10- to 12-hole transverse ocarina offers an extended range. It suits motivated adults who want to progress without soon needing another instrument.
A pendant ocarina, with 4 to 6 holes, is ideal for small hands or a gentle introduction. It is simple and fun, but its range limits more complex pieces.
As for pitch, most beginners prefer an alto in C. It is versatile and comfortable to play. A soprano sounds bright and high; a bass requires more air and experience.
Materials: ceramic produces a warm, full sound but is fragile. Plastic is sturdy and light, making it practical for practice on the go, though its sound may lack depth.
| Criterion | 10- to 12-hole transverse | 4- to 6-hole pendant |
|---|---|---|
| Ease of handling | More technical, stable | Very simple, immediately accessible |
| Progression | Wide range, less frequent need to change instruments | Limited range, may need replacing |
| Recommended for | Motivated adults | Children and people with small hands |
| Common materials | Ceramic or plastic | Plastic or ceramic |
Budget and quality: allow a reasonable budget for accurate tuning and precisely formed holes. Avoid untuned Peruvian models. Choose established brands such as STL or Hindocarina.
In short, start with a reliable, well-made alto in C to make the most of your practice time. To learn more about handling the instrument and trying your first exercises, see this detailed guide.
How to hold the ocarina and position your fingers correctly
Good hand position gives you precise control over the holes and tone. Hold the instrument with your hands approaching from opposite sides, with each finger, including your thumbs, covering its designated hole. Place your thumbs over the holes at the back, and keep your fingers slightly curved to seal the holes fully.
Finger position, hole coverage and stability
Center the pad of each finger over its hole. This helps prevent air leaks and wrong notes.
Test your grip: first hold the instrument very loosely, then very firmly. Find a comfortable position between the two and avoid squeezing it. Your grip should be stable but relaxed.
Embouchure, the right thumb and posture
Rest the mouthpiece against your lips. Shape your lips as if saying “boo,” without touching the mouthpiece with your teeth, to produce a steady, clean breath.
Keep your right thumb straight. Firm support without bending it back makes high notes easier and protects the instrument.
Standing posture: keep your back straight, shoulders relaxed and feet hip-width apart. Use a mirror to check that your wrists are aligned and your shoulders remain relaxed.
“Taking two minutes to set your grip, embouchure and quiet breath lays the groundwork for accuracy before your first note.”
| Element | Practical advice | Expected result |
|---|---|---|
| Fingers | Center the pad of each finger over its hole | Better intonation |
| Thumbs | Keep the right thumb straight to support the instrument without bending it back | Easier high notes |
| Grip | Hold the instrument steadily, without being too loose or tense | Easier quick movements |
| Embouchure | Shape your lips as if saying “boo,” without touching the mouthpiece with your teeth | A clean sound and controlled airflow |
For a complete guide to holding the instrument and positioning your fingers, see this tutorial.
Breathing and your first clear notes
Controlled breathing makes all the difference. Practice diaphragmatic breathing: place one hand on your abdomen, keep your shoulders still and breathe in deeply. Exhale slowly and evenly to stabilize the flow of air.

Diaphragmatic breathing and pressure control
Learn to regulate breath pressure: as notes rise, you need to push more air, but without forcing it. Too little breath produces a weak sound; too much creates a whistle. Vary the pressure slowly until you find what produces a good tone.
Discover the breath curve
The “breath curve” helps you move up or down through notes without spoiling the tone. Make a candle flame flicker without blowing it out to get a feel for the right intensity.
Long-tone exercise and tongued attacks
Practical exercise: start a note with your tongue, hold it throughout your exhalation and stop it cleanly before you run out of air. Use a tuner, such as OcarinaTuner, to check its stability.
- Play three long tones while monitoring your intonation.
- Make eight clean tongued attacks to gain control over them.
- Glide through different breath pressures to feel the intensity curve.
“Keep your embouchure gentle and the opening between your lips steady: avoid putting the mouthpiece inside your mouth.”
Practical tip: repeat this short routine for five minutes each session. Working on your breath and embouchure produces purer notes and prepares you to play ocarina melodies. This instrument responds quickly to a well-controlled breath.
How to play the ocarina: the basics, step by step
Clear reference points on the instrument make all the difference. Number the holes according to your 4-, 6- or 12-hole model. Add a simple color code: 1 in red, 2 in orange, 3 in yellow and so on. This visual aid supports spatial memory and helps you learn finger positions faster.
Numbering and visual aids
On a 6-hole model, numbering usually follows the front row and then the back. For a 4-hole model, use the Taylor method and work through it in stages. A 12-hole model has a wider range and follows the same basic approach.
Essential fingerings and switching between models
Learn the basic fingerings for each model. Print the manufacturer’s chart, such as one from STL, and keep it in view. When switching models, compare the relative finger positions instead of looking for exact equivalents.
The C major scale and a 15-minute routine
Recommended exercise: spend 5 minutes reviewing fingerings, 5 minutes playing scales and 5 minutes connecting notes. Set a metronome to 60 BPM. Play the C major scale up and down, holding each note for a fixed duration before moving on.
Example: hold each scale degree for two beats, then move up a semitone once you can play steadily.
Read ocarina tablature and sheet music
Tablature makes melodies much more accessible without requiring you to read staff notation. It is a visual system that uses numbers or symbols to show which holes to cover. It is ideal for learning a piece quickly.

Simple tablature: symbols, note lengths and resources
The main symbols are numbers for the holes, bar lines and note-length markings. They guide phrasing and rhythmic playing.
- Numbers: holes to cover.
- Bar lines: the structure of each measure.
- Note lengths: whole notes, quarter notes and eighth notes.
Reliable resource: OcarinaTabs.org offers hundreds of songs organized by difficulty.
Treble-clef sheet music and transposition
Reading a staff means recognizing pitches, note lengths and accidentals. Understanding a few rhythmic basics helps you become more independent.
MuseScore lets you transpose a piece into a range that suits your instrument.
Example: the tablature “3-2-1” often corresponds to a simple sequence in C major on the staff. Always check it against the fingering chart for your model.
| Element | Purpose | Result |
|---|---|---|
| Tablature | Quick access | Immediate learning |
| Sheet music | Understanding notes | Musical independence |
| MuseScore | Transposition | Adaptation to your instrument’s range |
Short method: first learn a song from tablature, then find it in sheet music. This two-part approach strengthens your ear and your ability to read notes.
Progress quickly: practice methods and techniques
A structured routine can speed up your progress on this instrument. Organize each session around breath, technique and musical expression. A clear routine helps you stay focused and build control.

A sample practice session
Spend 5 to 10 minutes warming up your breathing with diaphragmatic breaths and long tones to stabilize the flow of air.
Then spend 10 minutes on scales and selected fingerings, 10 to 15 minutes on a difficult passage and 10 minutes on your main piece.
Finish with 5 to 10 minutes of guided improvisation in C major to develop your listening and creativity.
Techniques: vibrato, articulation and tempo
Diaphragmatic vibrato: make small, regular changes in breath pressure from your abdomen, never your throat. Vibrato should enrich the melody without pushing the note out of tune.
Alternate legato and staccato passages to refine how you begin and end notes. Practice the same phrase both ways.
Build speed in stages: play slowly and evenly, then gradually increase the tempo while staying in tune.
“Recording yourself is a simple way to measure your progress and adjust your tempo and articulation.”
Practical tip: check your posture in a mirror at the start of each session. Finish with one or two long tones to reinforce the control you have developed.
Avoid common beginner mistakes
Avoiding technical mistakes helps you progress faster and maintain a good sound. A simple adjustment to your breath pressure and finger position often solves the main difficulties beginners face.

Signs of blowing too hard: a shrill high note or an unstable tone indicates excessive pressure. Reduce your breath and try the candle test to find the right intensity again.
Covering the holes: air leaks cause wrong notes. Lift your fingers about 1 cm and center each fingertip over its hole to make a good seal.
- Practice one note at a time with a tuner, such as OcarinaTuner, to learn the right breath pressure.
- Correct unnecessary movements: lift your fingers only a little and keep their movements even to avoid tapping sounds and timing errors.
- Break difficult sequences into groups of two notes, then three, to make transitions more reliable.
Return to long tones whenever your intonation starts to drift. Holding a note helps you regain control of your breathing and airflow.
“68% of beginners correct most intonation problems within three weeks by using a tuner and practicing slowly.”
Practical tip: record difficulties in a notebook and follow a short checklist before each session: posture, embouchure, breath, hole coverage and active listening. Do this several times a week for lasting progress.
Care for and protect your instrument
A few quick steps will help keep your ocarina in excellent condition. After each session, remove condensation and gently wipe the mouthpiece and accessible openings with a soft cloth.
Cleaning, drying and storage
For a plastic ocarina, dry it promptly with absorbent paper or newspaper. This limits condensation and preserves its response to your breath.
Ceramic is better suited to air drying, away from sunlight and extreme temperatures, ideally between 15 and 25 °C. Never immerse the instrument.
- Quick routine: remove condensation, wipe the mouthpiece and leave the instrument upright to dry for about ten minutes.
- Humidity: put desiccant packets in the case and store the instrument in a ventilated room.
- Transport: choose a fitted hard case, such as one made by Pelican or Noblex, to protect it from impacts.
| Material | Drying | Protection | Note |
|---|---|---|---|
| Plastic | Dries quickly; wipe immediately | Hard case and desiccant packet | Durable, but prone to condensation |
| Ceramic | Air dry away from sun and cold | Padded case and stable temperature | More fragile; watch for hairline cracks |
| General | Never immerse | Occasional cleaning and inspection | Record the purchase date and maintenance |
Minor repairs: a Loctite-type repair kit can fill a hairline crack, but check the stability of the tuning afterward.
Regular care saves time and keeps the instrument’s response to your breath consistent.
Conclusion
Conclusion
A short, regular practice routine is enough to make quick progress. Work each day on your grip, posture, embouchure, hole coverage and breathing. A few minutes of long tones, scales and fingering exercises will steady your notes.
Choose a well-tuned alto in C, made from ceramic or plastic according to your budget. Pick two simple songs and an exercise that moves up and down the scale, then review a set of fingerings during each session.
Use a metronome, a tuner and online resources. For more learning material, see these ocarina lessons.
Record yourself once a week, care for your instrument and protect its mouthpiece. Start today: step by step, learning to play the ocarina becomes natural and rewarding.